|
|
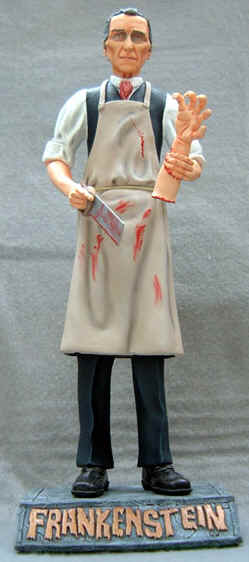
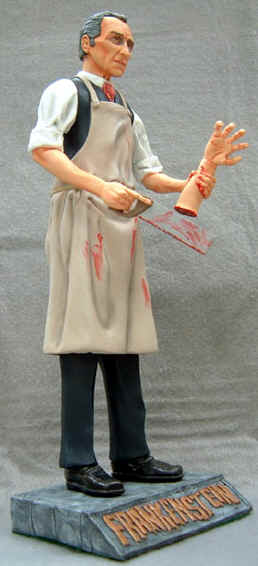
Peter
Cushing
as
The Baron
Frankenstein
1/6 resin
Mysteria Models
by Keith
Cousins ("Cous3")
|
|
|
|
 |
This
was my first commissioned piece.
I think the owner of the kit took one look
at it in it's basic form and freaked.......
all that prep work !
The kit came in 8 parts including the base
and a small piece of hack saw blade.
A fair amount of clean up was required
before any kind of assembly could take
place, I used my Dremmel to clean off
most of the excess flashing.
The Dremmel was also used to open up
the saw handle where the fingers pass
through and also to put a deep groove into
the leading edge of the handle so it would
accept the of hack saw blade securely.
Once the parts had been cleaned up, any
defects filled and rubbed down, the kit was
thoroughly washed and left to dry. |
|
|
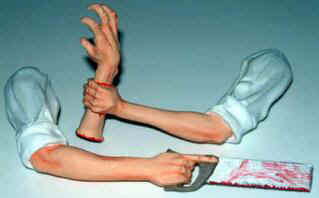
I
started assembling the arms first. |
The
left arm/hand needed the blade attached, for
this I used a thin line of
Milliput in the groove I had already cut
into the handle, after blending the blade
into the handle it was left to dry.
The right arm/hand was clasping the severed
limb, this just needed the hand
pinned to the arm and to fill the
join. |
|
|
|
|
|
Once
both assemblies were dry I used fine wet and dry paper
to smooth the
filler, they, along with the head were then primed with
white auto primer. |
|
|
|
|
The
legs were next, these were drilled/pinned/glued to
the torso under the apron so no joint could be
seen........unless you looked under the apron. The gap
between the leg assembly and apron was filled with
Milliput, there was no real need to do this, but I knew
the gap was there and it bugged me. I also took this
opportunity to drill the legs to accept a dowel rod that
I would insert into the base. The kit would stand up on
it's own with no problems, but as this was for a
customer I thought best to secure the kit to the
base. Again once dried the torso/leg assembly along
with the base, were primed with the same white auto
primer.
When all parts had dried I decided
in which position I want the arms, they were then
drilled/pinned/glued in place and the joins filled. The
head was also pinned but would be left
off for ease of painting and attached at the
very end.
|
|
|
|
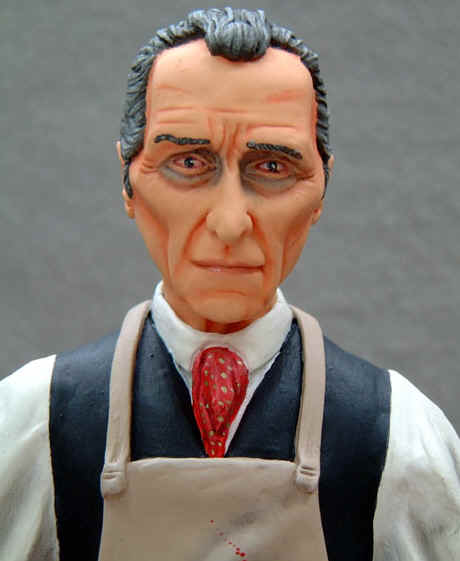
The head
and arms, including the severed arm, were painted Flat Flesh and
shaded with pastels and face powder, hair was Dark Grey drybrushed lighter
shades of Grey and dusted with White. Bright Red was added for the
blood on the severed arm.
The apron was given a few coats of Khaki as I thought White was
just too "harsh", it was then drybrushed with lighter
shades of the same and light Grey pastel was used on the folds.
Bright Red was used to stain the apron and the saw blade.
His trousers and waist coat were painted Midnight Blue drybrushed
with Sea Blue and the shirt was White, again light Grey
pastel was used on the folds.
Shoes were base coated Matt Black drybrushed with Dark Brown and
sealed with a Satin sealant to give
that leather look. |
|
|
|
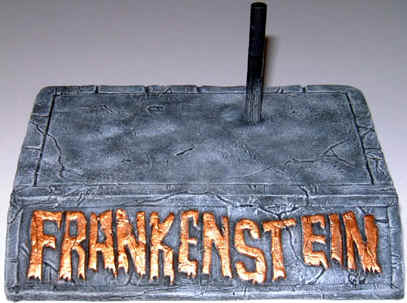
The base was drilled to
accept the wooden dowel, then base coated in Matt Black with several
shades of Greys drybrushed over the top. Lettering was given two coats
of Bronze and to finish the base I glued Green felt on the bottom. All
that was left was to attach the painted head, seal the kit with a Matt
sealant.
|
|
|
|
|
